TrueNAS [Community]
This is a community contribution and not officially supported by the Immich team, but included here for convenience.
Community support can be found in the dedicated channel on the Discord Server.
Please report app issues to the corresponding GitHub Repository.
This guide covers the installation of Immich on TrueNAS Community Edition 24.10.2.2 (Electric Eel) and later.
We recommend keeping TrueNAS Community Edition and Immich relatively up to date with the latest versions to avoid any issues.
If you are using an older version of TrueNAS, we ask that you upgrade to the latest version before installing Immich. Check the TrueNAS Community Edition Release Notes for more information on breaking changes, new features, and how to upgrade your system.
Immich can easily be installed on TrueNAS Community Edition via the Community train application. Consider reviewing the TrueNAS Apps resources if you have not previously configured applications on your system.
First Steps
Setting up Storage Datasets
Before beginning app installation, create the datasets to use in the Storage Configuration section during installation.
In TrueNAS, Immich requires 2 datasets for the application to function correctly: data and pgData. You can set the datasets to any names to match your naming conventions or preferences.
You can organize these as one parent with two child datasets, for example /mnt/tank/immich/data and /mnt/tank/immich/pgData.

The pgData dataset must be owned by the user netdata (UID 999) for Postgres to start.
The data dataset must have given the modify permission to the user who will run Immich.
Since TrueNAS Community Edition 24.10.2.2 and later, Immich can be run as any user and group, the default user being apps (UID 568) and the default group being apps (GID 568). This user, either apps or another user you choose, must have modify permissions on the data dataset.
For an easy setup:
- Create the parent dataset
immichkeeping the default Generic preset. - Select
Dataset PresetApps instead of Generic when creating thedatadataset. This will automatically give the correct permissions to the dataset. If you want to use another user for Immich, you can keep the Generic preset, but you will need to give the modify permission to that other user. - For the
pgDatadataset, you can keep the default preset Generic as permissions can be set during the installation of the Immich app (See Storage Configuration section).
To improve performance, Immich recommends using SSDs for the database. If you have a pool made of SSDs, you can create the pgData dataset on that pool.
Thumbnails can also be stored on the SSDs for faster access. This is an advanced option and not required for Immich to run. More information on how you can use multiple datasets to manage Immich storage in a finer-grained manner can be found in the Advanced: Multiple Datasets for Immich Storage section below.
If you just created the datasets using the Apps preset, you can skip this warning section.
If the data dataset uses ACL it must have ACL mode set to Passthrough if you plan on using a storage template and the dataset is configured for network sharing (its ACL type is set to SMB/NFSv4). When the template is applied and files need to be moved from upload to library (internal folder created by Immich within the data dataset), Immich performs chmod internally and must be allowed to execute the command. More info.
To change or verify the ACL mode, go to the Datasets screen, select the library dataset, click on the Edit button next to Dataset Details, then click on the Advanced Options tab, scroll down to the ACL Mode section, and select Passthrough from the dropdown menu. Click Save to apply the changes. If the option is greyed out, set the ACL Type to SMB/NFSv4 first, then you can change the ACL Mode to Passthrough.
Installing the Immich Application
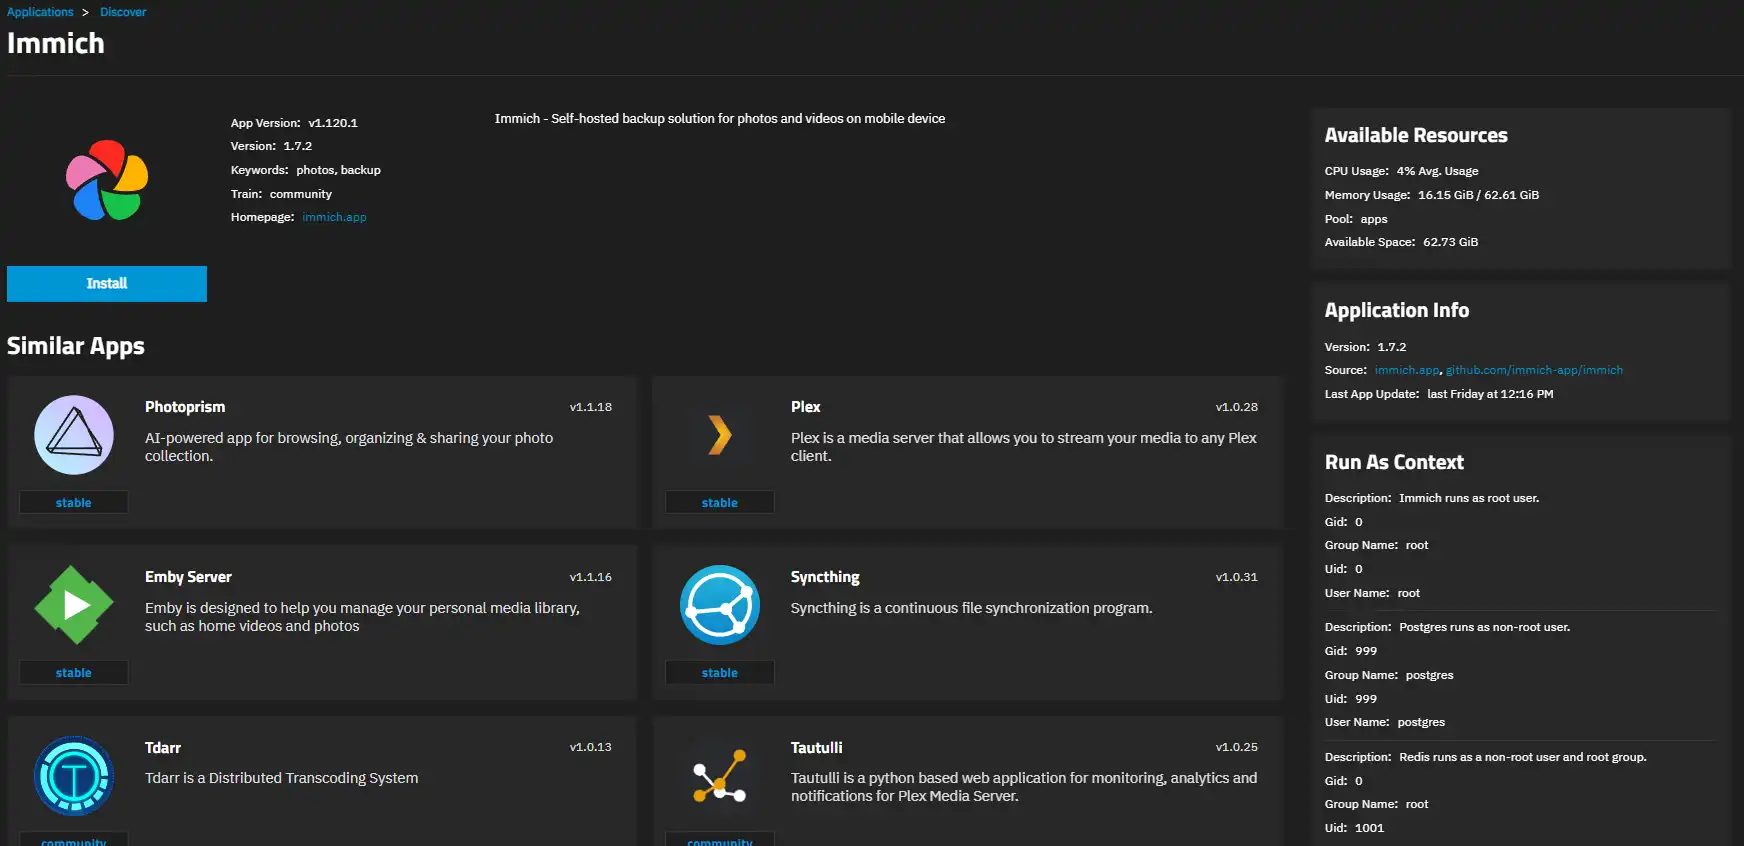
To install the Immich application, go to Apps, click Discover Apps, and either begin typing Immich into the search field or scroll down to locate the Immich application widget.
Click on the widget to open the Immich application details screen.

Click Install to open the Immich application configuration screen.
Application configuration settings are presented in several sections, each explained below. To find specific fields, click in the Search Input Fields search field, scroll down to a particular section, or click on the section heading on the navigation area in the upper-right corner.
Application Name and Version

Keep the default value or enter a name in the Application Name field.
Change it if you’re deploying a second instance.
Immich version within TrueNAS catalog (Different from Immich release version).
Immich Configuration
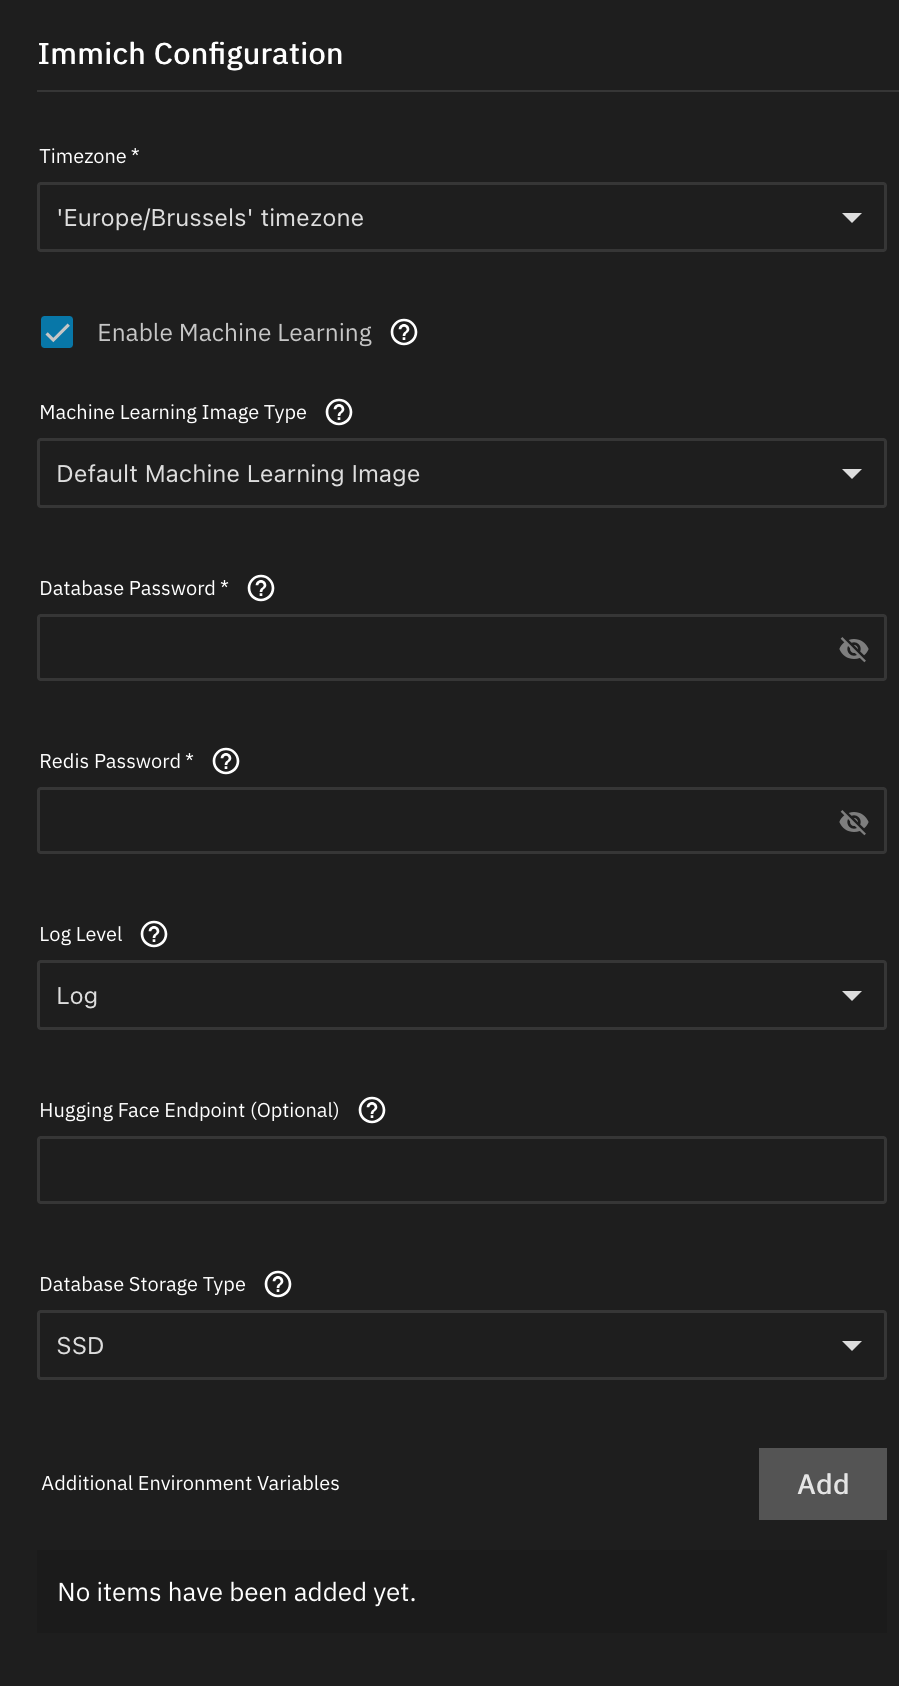
The Timezone is set to the system default, which usually matches your local timezone. You can change it to another timezone if you prefer.
Enable Machine Learning is enabled by default. It allows Immich to use machine learning features such as face recognition, image search, and smart duplicate detection. Untick this option if you do not want to use these features.
Select the Machine Learning Image Type based on the hardware you have. More details here: Hardware-Accelerated Machine Learning
Database Password should be set to a custom value using only the characters A-Za-z0-9. This password is used to secure the Postgres database.
Redis Password should be set to a custom value using only the characters A-Za-z0-9. Preferably, use a different password from the database password.
Keep the Log Level to the default Log value.
Leave Hugging Face Endpoint blank. (This is used to download ML models from a different source.)
Set Database Storage Type to the type of storage (HDD or SSD) that the pool where the pgData dataset is located uses.
Additional Environment Variables can be left blank.
Advanced users: Adding Environment Variables
Environment variables can be set by clicking the Add button and filling in the Name and Value fields.

These are used to add custom configuration options or to enable specific features. More information on available environment variables can be found in the environment variables documentation.
Some environment variables are not available for the TrueNAS Community Edition app as they can be configured through GUI options in the Edit Immich screen.
Some examples are: IMMICH_VERSION, UPLOAD_LOCATION, DB_DATA_LOCATION, TZ, IMMICH_LOG_LEVEL, DB_PASSWORD, REDIS_PASSWORD.
User and Group Configuration
Application in TrueNAS runs as a specific user and group. Immich uses the default user apps (UID 568) and the default group apps (GID 568).

-
User ID: Keep the default value
apps(UID 568) or define a different one if needed. -
Group ID: Keep the default value
apps(GID 568) or define a different one if needed.
If you change the user or group, make sure that the datasets you created for Immich data storage have the correct permissions set for that user and group as specified in the Setting up Storage Datasets section above.
Network Configuration
-
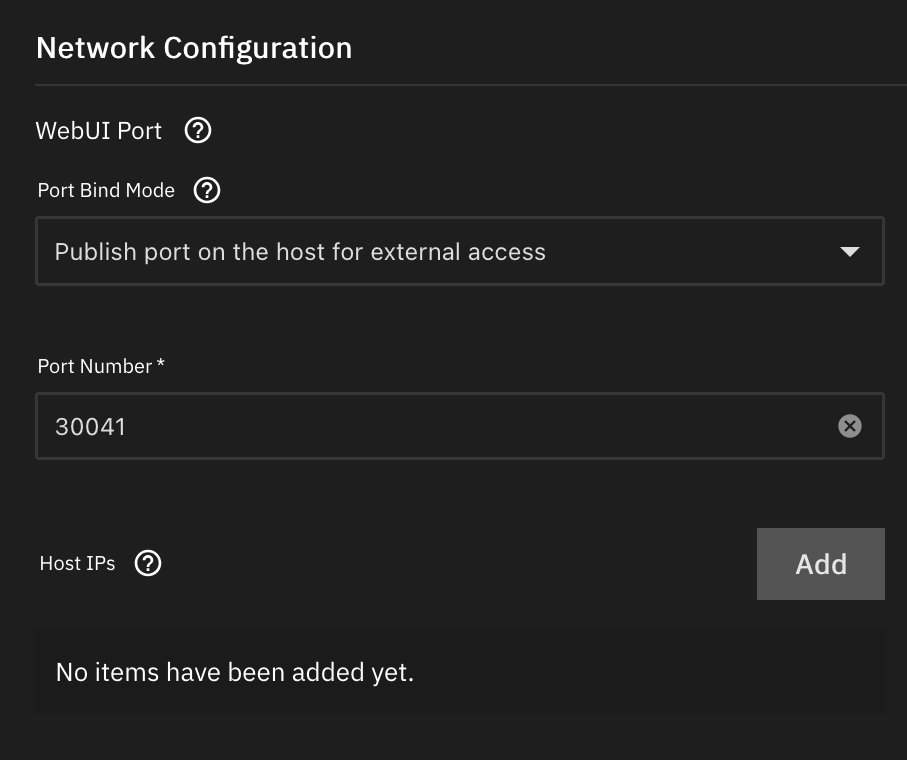
Port Bind Mode: This lets you expose the port to the host system, allowing you to access Immich from outside the TrueNAS system. Keep the default Publish port on the host for external access value unless you have a specific reason to change it.
-
Port Number: Keep the default port
30041or enter a custom port number. -
Host IPs: Leave the default blank value.
Storage Configuration
The default setting for datasets is ixVolume (dataset created automatically by the system). This is not recommended as this results in your data being harder to access manually and can result in data loss if you delete the immich app. It is also harder to manage snapshots and replication tasks. It is recommended to use the Host Path (Path that already exists on the system) option instead.
The storage configuration section allows you to set up the storage locations for Immich data. You can select the datasets created in the previous step.
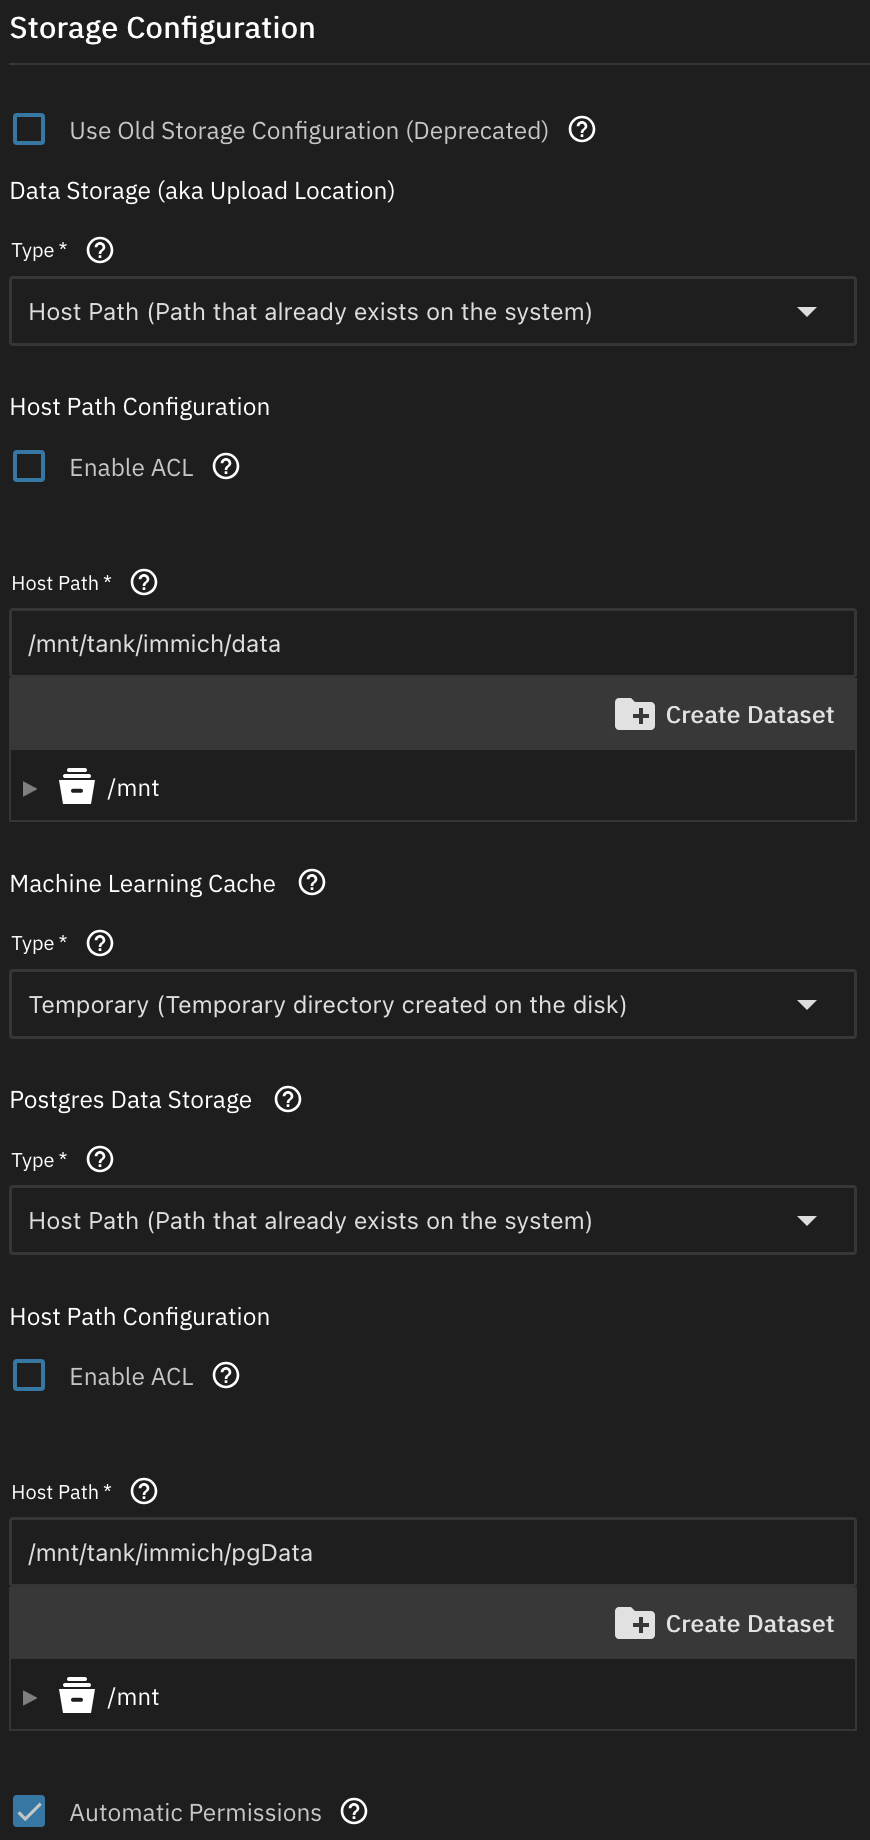
For the Data Storage, select Host Path (Path that already exists on the system) and then select the dataset you created for Immich data storage, for example, data.
The Machine Learning cache can be left with default Temporary
For the Postgres Data Storage, select Host Path (Path that already exists on the system) and then select the dataset you created for Postgres data storage, for example, pgData.
Postgres Data Storage
Once Host Path is selected, a checkbox appears with Automatic Permissions. If you have not set the ownership of the pgData dataset to netdata (UID 999), tick this box as it will set the user ownership to netdata (UID 999) and the group ownership to docker (GID 999) automatically. If you have set the ownership of the pgData dataset to netdata (UID 999), you can leave this box unticked.
Additional Storage (Advanced Users)
External Libraries
This feature should only be used by advanced users. If this is your first time installing Immich, then DO NOT mount an external library until you have a working setup.
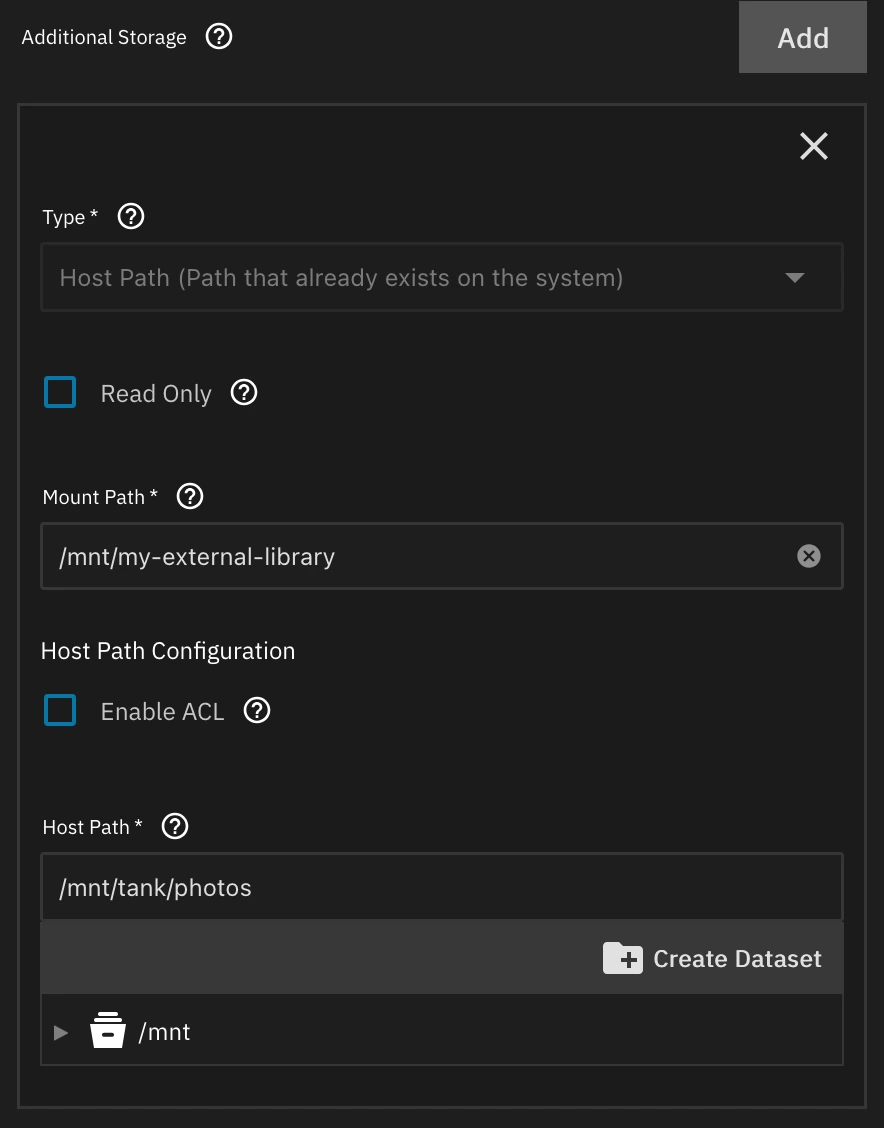
You may configure external libraries by mounting them using Additional Storage.
The dataset that contains your external library files must at least give read access to the user running Immich (Default: apps (UID 568), apps (GID 568)).
If you want to be able to delete files or edit metadata in the external library using Immich, you will need to give the modify permission to the user running Immich.
- Mount Path is the location you will need to copy and paste into the external library settings within Immich.
- Host Path is the location on the TrueNAS Community Edition server where your external library is located.
- Read Only is a checkbox that you can tick if you want to prevent Immich from modifying the files in the external library. This is useful if you want to use Immich to view and search your external library without modifying it.
Each mount path MUST be something unique and should NOT be your library or upload location or a Linux directory like /lib.
A general recommendation is to mount any external libraries to a path beginning with /mnt or /media followed by a unique name, such as /mnt/external-libraries or /media/my-external-libraries. If you plan to mount multiple external libraries, you can use paths like /mnt/external-libraries/library1, /mnt/external-libraries/library2, etc.
Multiple Datasets for Immich Storage
This feature should only be used by advanced users.
Immich can use multiple datasets for its storage, allowing you to manage your data more granularly, similar to the old storage configuration. This is useful if you want to separate your data into different datasets for performance or organizational reasons. There is a general guide for this here, but read on for the TrueNAS guide.
Each additional dataset has to give the permission modify to the user who will run Immich (Default: apps (UID 568), apps (GID 568))
As described in the Setting up Storage Datasets section above, you have to create the datasets with the Apps preset to ensure the correct permissions are set, or you can set the permissions manually after creating the datasets.
Immich uses 6 folders for its storage: library, upload, thumbs, profile, encoded-video, and backups. You can create a dataset for each of these folders or only for some of them.
To mount these datasets:
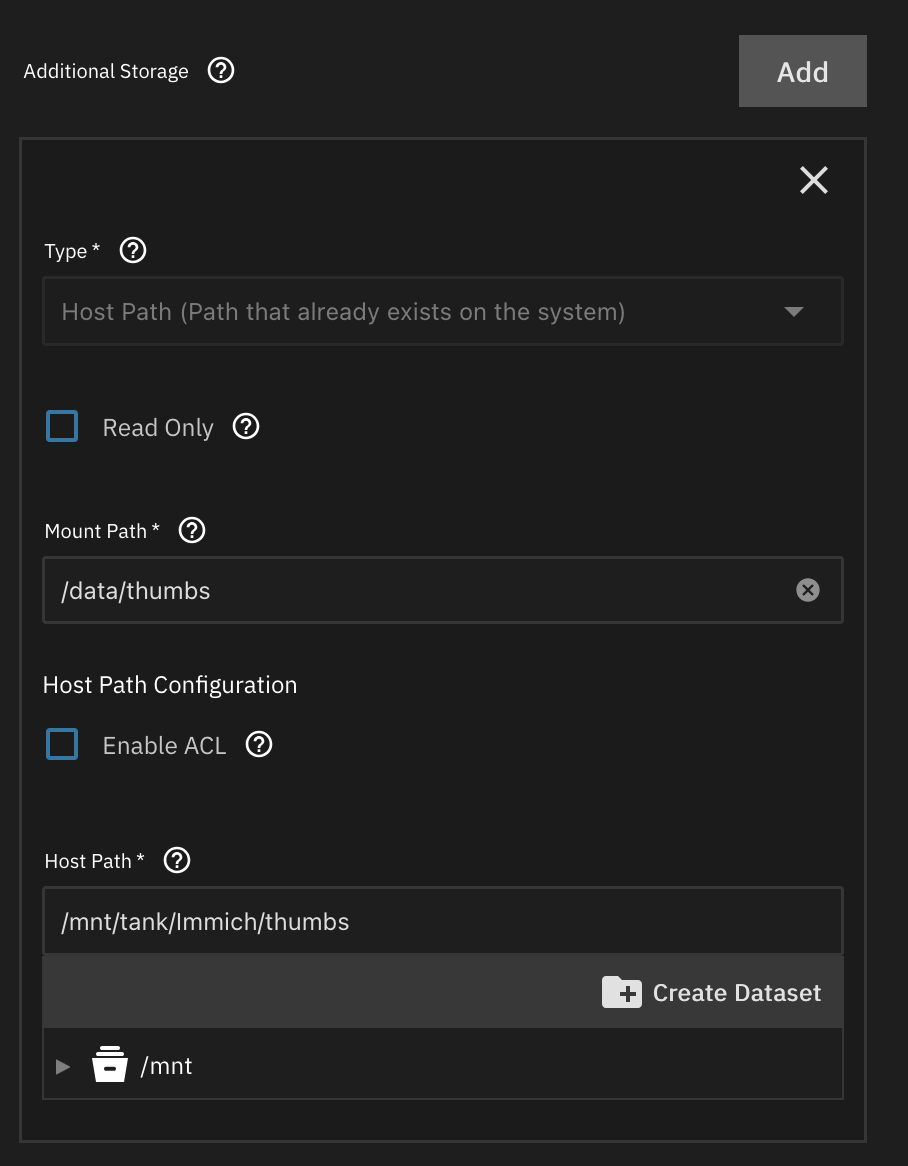
- Add an Additional Storage entry for each dataset you want to use.
- Select Type as Host Path (Path that already exists on the system).
- Enter the Mount Path with
/data/<folder-name>. The<folder-name>is the name of the folder you want to mount, for example,library,upload,thumbs,profile,encoded-video, orbackups.ImportantYou have to write the full path, including
/data/, as Immich expects the data to be in that location.
If you do not include this path, Immich will not be able to find the data and will not write the data to the location you specified. - Select the Host Path as the dataset you created for that folder, for example,
/mnt/tank/immich/library,/mnt/tank/immich/upload, etc.
Resources Configuration

-
CPU: Depending on your system resources, you can keep the default value of
2threads or specify a different number. Immich recommends at least8threads. -
Memory: Limit in MB of RAM. Immich recommends at least 6000 MB (6GB). If you selected Enable Machine Learning in Immich Configuration, you should probably set this above 8000 MB.
Both CPU and Memory are limits, not reservations. This means that Immich can use up to the specified amount of CPU threads and RAM, but it will not reserve that amount of resources at all times. The system will allocate resources as needed, and Immich will use less than the specified amount most of the time.
- Enable GPU Configuration options if you have a GPU or CPU with integrated graphics that you will use for Hardware Transcoding and/or Hardware-Accelerated Machine Learning.
The process for NVIDIA GPU passthrough requires additional steps. More details here: GPU Passthrough Docs for TrueNAS Apps
Install
Finally, click Install. The system opens the Installed Applications screen with the Immich app in the Deploying state. When the installation completes, it changes to Running.
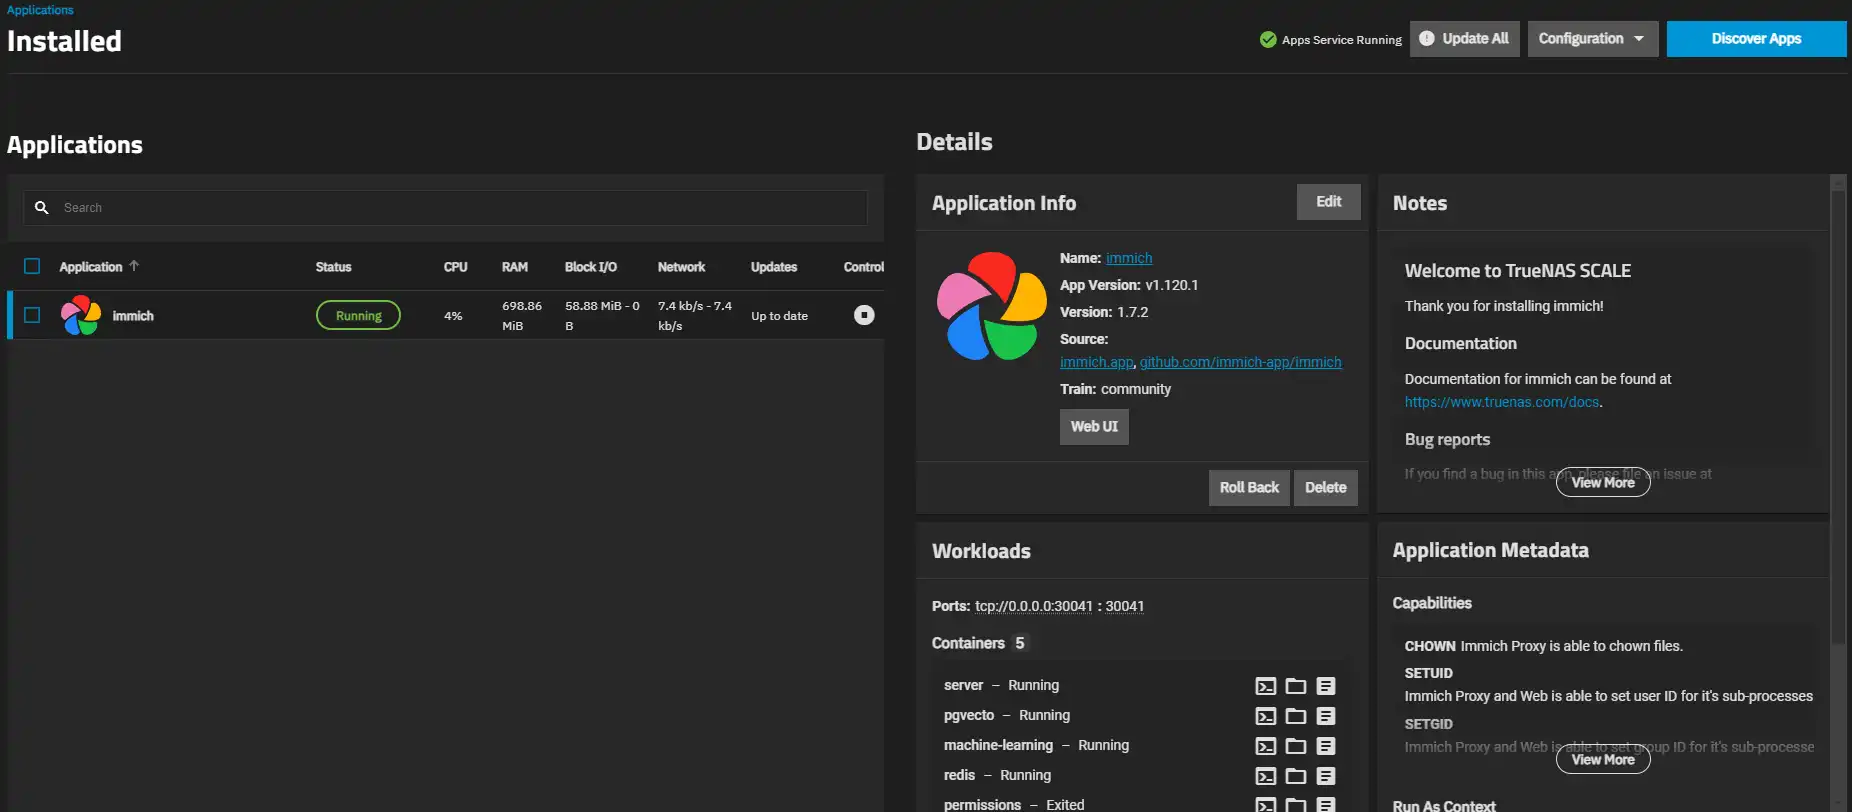
Click Web Portal on the Application Info widget, or go to the URL http://<your-truenas-ip>:30041 in your web browser to open the Immich web interface. This will show you the onboarding process to set up your first user account, which will be an administrator account.
After that, you can start using Immich to upload and manage your photos and videos.
For more information on how to use the application once installed, please refer to the Post Install guide.
Edit App Settings
- Go to the Installed Applications screen and select Immich from the list of installed applications.
- Click Edit on the Application Info widget to open the Edit Immich screen.
- Change any settings you would like to change.
- The settings on the edit screen are the same as on the install screen.
- Click Update at the very bottom of the page to save changes.
- TrueNAS automatically updates, recreates, and redeploys the Immich container with the updated settings.
Updating the App
Make sure to read the general upgrade instructions.
When updates become available, TrueNAS alerts and provides easy updates. To update the app to the latest version:
- Go to the Installed Applications screen and select Immich from the list of installed applications.
- Click Update on the Application Info widget from the Installed Applications screen.
- This opens an update window with some options
- You may select an Image update too.
- You may view the Changelog.
- Click Upgrade to begin the process and open a counter dialog that shows the upgrade progress.
- When complete, the update badge and buttons disappear and the application Update state on the Installed screen changes from Update Available to Up to date.
Migration
Perform a backup of your Immich data before proceeding with the migration steps below. This is crucial to prevent any data loss if something goes wrong during the migration process.
The migration should also be performed when the Immich app is not running to ensure no data is being written while you are copying the data.
Migration from Old Storage Configuration
There are two ways to migrate from the old storage configuration to the new one, depending on whether you want to keep the old multiple datasets or if you want to move to a double dataset configuration with a single dataset for Immich data storage and a single dataset for Postgres data storage.
If you were using an older version of TrueNAS (before 24.10.2.2), the datasets, except the one for pgData had only to be owned by the root user (UID 0). You might have to add the modify permission to the apps user (UID 568) or the user you want to run Immich as, to all of them, except pgData. The steps to add or change ACL permissions are described in the TrueNAS documentation.
- Migrate data to a new dataset (recommended)
- Keep the existing datasets
To migrate from the old storage configuration to the new one, you will need to create a new dataset for the Immich data storage and copy the data from the old datasets to the new ones. The steps are as follows:
- Stop the Immich app from the TrueNAS web interface to ensure no data is being written while you are copying the data.
- Create a new dataset for the Immich data storage, for example,
data. As described in the Setting up Storage Datasets section above, create the dataset with the Apps preset to ensure the correct permissions are set. - Copy the data from the old datasets to the new dataset. We advise using the
rsynccommand to copy the data, as it will preserve the permissions and ownership of the files. The following commands are examples:
rsync -av /mnt/tank/immich/library/ /mnt/tank/immich/data/library/
rsync -av /mnt/tank/immich/upload/ /mnt/tank/immich/data/upload/
rsync -av /mnt/tank/immich/thumbs/ /mnt/tank/immich/data/thumbs/
rsync -av /mnt/tank/immich/profile/ /mnt/tank/immich/data/profile/
rsync -av /mnt/tank/immich/video/ /mnt/tank/immich/data/encoded-video/
rsync -av /mnt/tank/immich/backups/ /mnt/tank/immich/data/backups/
Make sure to replace /mnt/tank/immich/ with the correct path to your old datasets and /mnt/tank/immich/data/ with the correct path to your new dataset.
If you were using ixVolume (dataset created automatically by the system) for Immich data storage, the path to the data should be /mnt/.ix-apps/app_mounts/immich/. You have to use this path instead of /mnt/tank/immich/ in the rsync command above, for example:
rsync -av /mnt/.ix-apps/app_mounts/immich/library/ /mnt/tank/immich/data/library/
If you were also using an ixVolume for Postgres data storage, you also should, first create the pgData dataset, as described in the Setting up Storage Datasets section above, and then you can use the following command to copy the Postgres data:
rsync -av /mnt/.ix-apps/app_mounts/immich/pgData/ /mnt/tank/immich/pgData/
Make sure that for each folder, the .immich file is copied as well, as it contains important metadata for Immich. If for some reason the .immich file is not copied, you can copy it manually with the rsync command, for example:
rsync -av /mnt/tank/immich/library/.immich /mnt/tank/immich/data/library/
Replace library with the name of the folder where you are copying the file.
-
Update the permissions as the permissions of the data that have been copied has been preserved, to ensure that the
appsuser (UID 568) has the correct permissions on all the copied data. If you just created the dataset with the Apps preset, from the TrueNAS web interface, go to the Datasets screen, select the data dataset, click on the Edit button next to Permissions, tick the "Apply permissions recursively" checkbox, and click Save. This will apply the correct permissions to all the copied data. -
Update the Immich app to use the new dataset:
- Go to the Installed Applications screen and select Immich from the list of installed applications.
- Click Edit on the Application Info widget.
- In the Storage Configuration section, untick the Use Old Storage Configuration (Deprecated) checkbox.
- For the Data Storage, select Host Path (Path that already exists on the system) and then select the new dataset you created for Immich data storage, for example,
data. - For the Postgres Data Storage, verify that it is still set to the dataset you created for Postgres data storage, for example,
pgData. - Click Update at the bottom of the page to save changes.
-
Start the Immich app from the TrueNAS web interface.
This will recreate the Immich container with the new storage configuration and start the app.
If everything went well, you should now be able to access Immich with the new storage configuration. You can verify that the data has been copied correctly by checking the Immich web interface and ensuring that all your photos and videos are still available. You may delete the old datasets, if you no longer need them, using the TrueNAS web interface.
If you were using ixVolume (dataset created automatically by the system) or folders for Immich data storage, you can delete the old datasets using the following commands:
rm -r /mnt/.ix-apps/app_mounts/immich/library
rm -r /mnt/.ix-apps/app_mounts/immich/uploads
rm -r /mnt/.ix-apps/app_mounts/immich/thumbs
rm -r /mnt/.ix-apps/app_mounts/immich/profile
rm -r /mnt/.ix-apps/app_mounts/immich/video
rm -r /mnt/.ix-apps/app_mounts/immich/backups
To migrate from the old storage configuration to the new one without creating new datasets.
- Stop the Immich app from the TrueNAS web interface to ensure no data is being written while you are updating the app.
- Update the datasets permissions: Ensure that the datasets used for Immich data storage (
library,upload,thumbs,profile,video,backups) have the correct permissions set for the user who will run Immich. The user should have modify permissions on these datasets. The default user for Immich isapps(UID 568) and the default group isapps(GID 568). If you are using a different user, make sure to set the permissions accordingly. You can do this from the TrueNAS web interface by going to the Datasets screen, selecting each dataset, clicking on the Edit button next to Permissions, and adding the user with modify permissions. - Update the Immich app to use the existing datasets:
- Go to the Installed Applications screen and select Immich from the list of installed applications.
- Click Edit on the Application Info widget.
- In the Storage Configuration section, untick the Use Old Storage Configuration (Deprecated) checkbox.
- For the Data Storage, you can keep the ixVolume (dataset created automatically by the system) as no data will be directly written to it. We recommend selecting Host Path (Path that already exists on the system) and then select a new dataset you created for Immich data storage, for example,
data. - For the Postgres Data Storage, keep Host Path (Path that already exists on the system) and then select the existing dataset you used for Postgres data storage, for example,
pgData. - Following the instructions in the Multiple Datasets for Immich Storage section, you can add, for each old dataset, a new Additional Storage with the following settings:
- Type:
Host Path (Path that already exists on the system) - Mount Path:
/data/<folder-name>(e.g./data/library) - Host Path:
/mnt/<your-pool-name>/<dataset-name>(e.g./mnt/tank/immich/library)
Ensure using the correct paths namesMake sure to replace
<folder-name>with the actual name of the folder used by Immich:library,upload,thumbs,profile,encoded-video, andbackups. Also, replace<your-pool-name>and<dataset-name>with the actual names of your pool and dataset.- Read Only: Keep it unticked as Immich needs to write to these datasets.
- Type:
- Click Update at the bottom of the page to save changes.
- Start the Immich app from the TrueNAS web interface. This will recreate the Immich container with the new storage configuration and start the app. If everything went well, you should now be able to access Immich with the new storage configuration. You can verify that the data is still available by checking the Immich web interface and ensuring that all your photos and videos are still accessible.